
How to Capture the Ultimate Automotive Rolling Shot

Let’s be honest—cars are built to be driven, and there’s no better way to showcase them than with a rolling shot, often called a “roller.” In this guide, I’ll break down everything you need—from camera settings to essential gear—to help you achieve the perfect shot. I’ll also reference an image from a shoot with Performance BMW Magazine to illustrate the process.
Essential Gear
To capture a high-quality rolling shot, you’ll need:
- A digital camera with a zoom lens (ideal for flexibility)
- A lens polarizer to reduce reflections
- A vehicle to shoot from
- A skilled driver for the lead car
- A driver for the subject vehicle
- Good judgment and safety awareness
Choosing the Right Location
For this particular shoot, we selected a stretch of road near the Newburgh-Beacon Bridge in Newburgh, New York.
Safety Disclaimer
Rolling shots require careful planning and can be risky. What we did for this shoot was technically illegal and potentially dangerous. Always ensure the road is clear, trust your drivers, and prioritize safety. I take no responsibility for any incidents that may occur during your shoot.
Scouting the Scene
If your shoot includes both static and rolling shots, consider nearby highways when planning. Evaluate the surroundings—what’s in the background? How heavy is the traffic? Should you shoot facing east or west for optimal lighting? In this case, the F80 M3 was painted in Grigio Telesto, and I wanted a backdrop that complemented the car’s color rather than just blurred trees, which can create a cluttered look. The mountainous terrain provided the perfect setting.
Preparing the Lead Car
For commercial shoots, roads are often closed to ensure safety. In professional settings, a technician known as a grip may modify the lead car—removing doors or hatches—to give the photographer an unobstructed shooting angle. Alternatively, cameras can be securely mounted to the vehicle for dynamic perspectives.
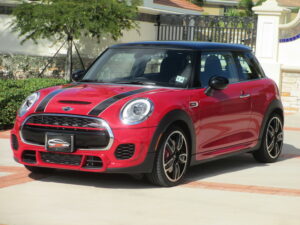
Professional grips set up a camera on a MINI from a shoot on a closed track in California. Not an option here.
Choosing the Right Lead Car
In a professional setting, modifying a lead car for an optimal shot might be an option, but in this case, I worked with what was available—the client’s family vehicle, a BMW X5. This SUV was a great choice because of its large windows, which allowed for a better shooting position, and its height, which provided a more dynamic vantage point over the F80. When selecting a lead car, consider these factors for better composition.
To maintain control and ensure safety, I instructed both drivers to follow my signals and keep their speed under 50 mph. Interestingly, a sense of motion can be effectively captured at speeds as low as 20 mph, so excessive speed isn’t necessary for achieving a dramatic rolling shot.
Camera Setup and Settings
Whenever possible, I use a polarizer to minimize reflections. While it may slightly darken the image, adjustments can always be made in post-processing. Autofocus should remain on, and securing the camera with a strap is essential to prevent accidental drops.
For this shot, taken with a crop sensor camera, I used the following settings:
- Focal length: 25mm
- Aperture (F-stop): f/10
- White Balance: Auto
- ISO Speed: 200
- Shutter Speed: 1/25
The key objective is to keep the car as sharp as possible while maintaining motion blur in the background. A shorter exposure time helps stabilize the image. If your lens has vibration reduction, enable it for additional clarity. My approach is to take a shot, let the camera refocus, and then fire again—since both the photographer and subject vehicle are in motion, maintaining sharp focus requires patience.
I set my ISO to 200 but could have gone higher without introducing excessive noise. A higher F-stop (smaller aperture) ensures the entire car remains in focus, as wider apertures can sometimes cause the rear of the vehicle to appear softer. Taking multiple shots—five or six at a time—allows for a better selection when reviewing the images.
Dealing with Challenges
Unexpected obstacles, such as potholes or unpredictable traffic, can ruin a shot, so patience is key. Ideally, there should be no other cars in the frame to keep the attention on the subject vehicle. Using a zoom lens instead of a prime lens is recommended, as it allows for quick adjustments in framing and composition.
Capturing the Perfect Shot
Experiment with different angles to create a more aggressive, dynamic look. Try positioning the camera high above the car and angling downward or as low to the ground as possible (which is how I captured this shot). Since you won’t always have a clear view through the viewfinder, sometimes you’ll need to rely on instinct—shoot, review, and adjust accordingly until you achieve the perfect result.

The original image, sans retouching. It’s on the dark side, but we’ll use the force and lighten it up in post.
Retouching the Image
Unlike a static shot that may require multiple exposures and extensive adjustments, editing a rolling shot is relatively straightforward. The motion already adds a dramatic effect, so the goal here is to enhance the image while maintaining its natural feel.
After opening the RAW file in Camera Raw, I applied the following adjustments to brighten the scene and bring out the details in the lower intakes of the car:
- Exposure: +15
- Contrast: -20
- Shadows: +30
- Blacks: -10
- Clarity: +30
- Dehaze: +5
Once these initial adjustments were made, I opened the image as a Smart Object for non-destructive editing. To further refine the lighting, I added a Curves adjustment layer, slightly lifting the darker areas to reveal more detail.
Lastly, I noticed a subtle red tint in the image. To correct this, I applied a Selective Color adjustment layer, reducing the unwanted tones for a cleaner, more balanced final look. After these refinements, the image was ready—enhanced yet still natural, capturing the perfect rolling shot.
The lightened version.
Final Adjustments and Refinements
To further enhance the image, start by duplicating all layers and flattening them into a new layer. This allows for non-destructive editing while keeping the original adjustments intact.
Next, use the Healing Brush or Clone Stamp tool to clean up any imperfections on the car’s surface, such as unwanted reflections—like red taillights—without affecting the surrounding details.
Once the surface is refined, convert the image into a Smart Object and open the Camera Raw filter to apply final enhancements. Adjust the following settings to bring out more clarity and direct focus toward the car:
- Clarity: +30
- Lens Correction (Vignette): -60
- Midpoint: 20
These adjustments add definition while subtly darkening the edges, creating a natural vignette effect that draws attention to the center of the frame where the car is positioned. At this stage, the image is nearly complete—polished, dramatic, and visually striking.
Editing to produce more clarity and contrast
Balancing Shadows and Enhancing Details
With the recent adjustments, the lower half of the car may appear slightly darker than desired. To correct this, follow these steps:
- Select all layers, group them, and duplicate the group.
- Flatten the duplicated group into a Smart Object to keep previous adjustments intact.
- Open the Camera Raw filter and adjust the Shadows to +50 to bring back detail in the darker areas.
- Add a Layer Mask to the image and black out the entire mask using (COMMAND + DELETE) on macOS or (CTRL + DELETE) on Windows.
- Select the Brush Tool, set it to a soft edge, and carefully paint back the highlights along the lower edges of the car, restoring depth and definition without overexposing the image.
This method ensures a balanced exposure, keeping the car well-lit while maintaining the dramatic feel of the shot. The result is a polished, professional-grade rolling shot with enhanced clarity and depth.
Magic!
Final Thoughts
And that’s it! Rolling shots are an exciting way to capture the motion and energy of a car, and the editing process enhances the final result beautifully. With the right setup, technique, and attention to detail, you can create stunning images that truly stand out.
These shots are not only fun to capture but also rewarding to refine in post-production. So get out there, experiment, and enjoy your roller adventures!