How to Find and Capture Stunning Photos of the Northern Lights
The Northern Lights, also known as the Aurora Borealis, are a mesmerizing winter phenomenon that illuminates the night sky with vibrant, dancing colors. These stunning displays occur when charged solar particles collide with gas molecules in Earth’s atmosphere, creating shades of green, pink, and blue. For many photographers, capturing this celestial event is a dream, but achieving the perfect shot is no easy feat.
Earth’s magnetic field generates poles in both the north and south, but since much of Antarctica is uninhabited, this guide focuses on the Northern Hemisphere. However, the same techniques apply if you ever find yourself photographing the Southern Lights (Aurora Australis).
Having photographed the aurora countless times, I’ve traveled across the globe in search of this ultimate astrophotography experience. While luck plays a role in witnessing the lights, careful planning significantly increases your chances of success. In this guide, I’ll walk you through the key preparations, essential gear, and optimal camera settings needed to capture breathtaking images of the Northern Lights.
Finding the Right Conditions
If you’re hoping to see the aurora near the equator, you’ll be disappointed. The best places for viewing are within or near the Arctic Circle. Ideal locations include Iceland, Northern Norway, Sweden, Finland, Canada, Greenland, Russia, and parts of the United States. Although rare, intense solar storms have pushed the lights as far south as the Caribbean—like during the famous Carrington Event of 1859.
To improve your chances, keep an eye on weather forecasts. Services like the Met Office or AccuWeather provide real-time updates on cloud cover in your chosen destination. Even a strong aurora display won’t be visible if the sky is overcast, so clear conditions are essential.
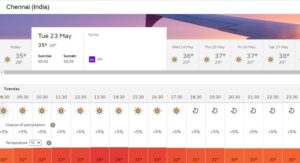
Checking the weather forecast before heading out to shoot could save a wasted trip.
Avoid Light Pollution for the Best Views
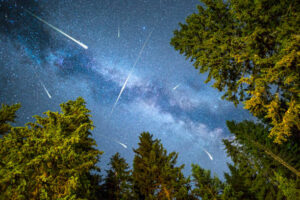
To increase your chances of seeing the Northern Lights, seek out locations with minimal light pollution. Use resources like Dark Site Finder or the International Dark-Sky Association to map out the darkest skies in your area. The farther you are from cities and built-up areas, the better your visibility will be. Artificial light can significantly diminish the intensity of the aurora, so remote locations are ideal.
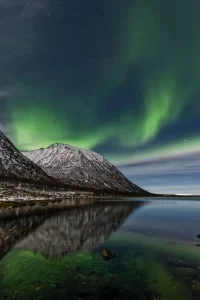
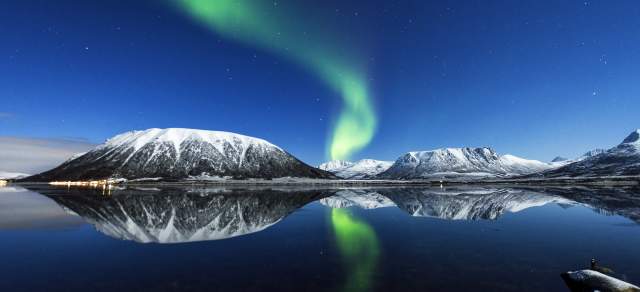
Once you’ve found a clear, dark sky, direct your gaze due north. A faint green band along the horizon is a common sight in northern latitudes, but during strong aurora activity, the lights can stretch across the entire sky in vibrant waves. Patience is key—some displays last only minutes, while others can dance across the sky for hours.
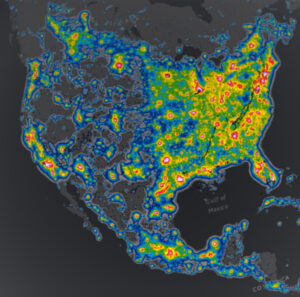
Avoid light pollution from nearby towns and cities for a clearer view of the northern lights.
Stay Updated with Aurora Forecasts
To maximize your chances of witnessing the Northern Lights, keep track of solar activity. Download an aurora forecasting app like My Aurora Forecast (available for iOS and Android), which provides real-time updates on Kp index strength—a key indicator of auroral activity. These apps can also send notifications when conditions are favorable for viewing.
For more detailed predictions, visit the Space Weather Prediction Center, which offers short-term aurora forecasts and models. Additionally, follow dedicated aurora tracking Twitter accounts, as they often post real-time alerts when the lights are likely to appear in your area.
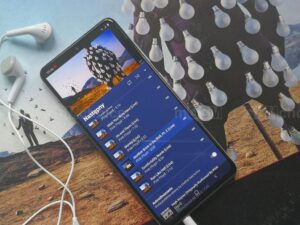
Tracking the northern lights on your smartphone is a quick and easy way of staying aware of auroral activity.
Essential Gear for Capturing the Northern Lights
Once you’ve chosen the perfect location and ensured clear skies, it’s time to start shooting. However, having the right equipment is crucial for capturing the beauty of the aurora.
Since Northern Lights photography often involves standing in freezing temperatures, dressing appropriately is essential. Wear multiple layers, including a warm hat, gloves, insulated boots, and thermal clothing to stay comfortable during long exposure sessions outdoors.
For photography, a DSLR or mirrorless camera with high ISO capabilities and minimal image noise is a must. Larger image sensors perform better in low-light conditions, particularly full-frame sensors, which offer superior sensitivity. Cameras with extremely high megapixel counts can sometimes introduce more noise, so a balanced resolution is ideal. If you’re serious about astrophotography, consider specialized models like the Canon Ra, which is designed specifically for capturing celestial events.
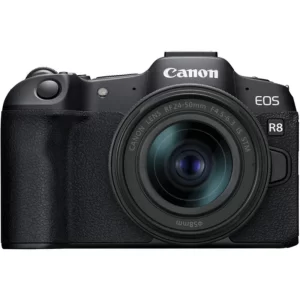
Astrophotography-specific cameras work by minimizing noise and maximizing light input
.
Choosing the Right Lens
A lens with a wide maximum aperture is essential for capturing as much light as possible in low-light conditions. Aim for an aperture of f/2.8 or wider to enhance brightness and detail in your shots. However, be mindful that shooting at the widest aperture can sometimes introduce optical issues like softness at the edges and heavy vignetting (darkening of the corners).
Wide-angle lenses are popular for Northern Lights photography because they allow you to capture a vast landscape with the aurora stretching across the sky. A wide-angle zoom lens with a constant wide aperture is an excellent choice, as it provides flexibility to recompose your shot without moving the camera. This adaptability can be especially useful when adjusting to the unpredictable movement of the lights.
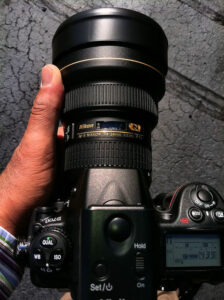
Wide-angle zooms are perfect for shooting a wide field of view and allow quick recomposition without moving
.
Must-Have Equipment: A Sturdy Tripod
A sturdy tripod is essential for capturing sharp, long-exposure shots of the Northern Lights. Check the payload capacity of the tripod to ensure it can securely support your camera and lens setup. Using an undersized tripod can lead to instability, especially in windy conditions.
A quality ball head is also highly recommended, as it allows for quick and precise adjustments in any direction. This flexibility is especially useful when composing shots of the sky, as you may need to point the camera directly upward to capture the aurora overhead.
Useful Accessories for Frequent Shooters
While not essential, certain accessories can make photographing the aurora easier and more efficient, particularly for those who plan to shoot frequently in winter conditions.
- External Shutter Release – Since aurora photography requires long exposure times, you need to trigger the shutter without physically touching the camera to prevent unwanted vibrations. Wired shutter releases are budget-friendly, but wireless options are better as they eliminate even the slightest risk of camera shake.
- Intervalometer – Many modern DSLR and mirrorless cameras come with built-in intervalometers, allowing you to capture a sequence of images without repeatedly pressing the shutter. If your camera lacks this feature, consider an external intervalometer like the Hahnel Captur, which provides advanced settings for timed long exposures and interval shooting, perfect for creating stunning time-lapse sequences of the aurora.
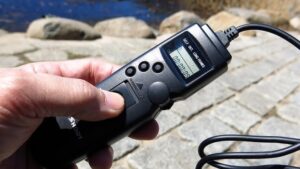
External shutter releases help to minimize camera shake during long exposures, keeping images sharp.
Preventing Lens Fogging and Improving Visibility
When transitioning your camera gear from warmer to colder environments, condensation can form on the lens, causing unwanted fogging. This is a common issue when stepping outside from a heated room or retrieving equipment from a car. To prevent this, consider using a lens warmer, which wraps around the lens barrel to maintain a stable temperature. This is particularly useful for extended shoots in freezing conditions, ensuring your lens remains clear throughout the session.
For better visibility while adjusting your gear in the dark, a head torch (headlamp) is an excellent investment. Opt for a red-light headlamp, as red light has a lower wavelength than white light, reducing disruption to your night vision. This allows you to see your surroundings and camera settings more effectively without compromising your ability to observe the aurora.
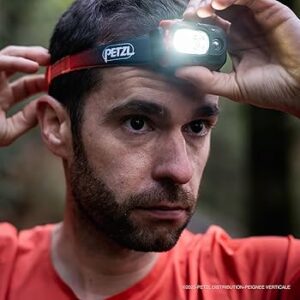
Red light is a lower wavelength visible light and retains night vision.
Using a Viewfinder Cover for Accurate Exposure
If you’re using a DSLR with an optical viewfinder, consider investing in a viewfinder cover. During long exposures, ambient light can enter through the viewfinder, affecting the camera’s metering and exposure, which may result in inaccurate or inconsistent shots.
Some cameras, like the Nikon D850, come with a built-in viewfinder shutter to block unwanted light. If your camera doesn’t have this feature, using a detachable viewfinder cover will help maintain accurate exposure and prevent unwanted light leaks from affecting your final image.
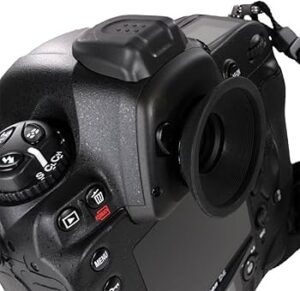
Optical viewfinders should be fitted with a viewfinder cap to prevent extraneous light entering the camera
Achieving Sharp Focus in Low Light
Autofocus often struggles in dark conditions, causing the lens to hunt back and forth, resulting in blurry images. To ensure sharp focus, it’s best to manually focus using the following techniques:
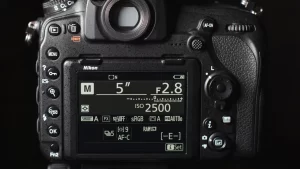
- Use Live View Mode – Activate Live View on your camera and look for a bright star or a distant artificial light source.
- Zoom In Digitally – Use your camera’s digital zoom to magnify the target on the screen.
- Switch to Manual Focus – Turn off autofocus and switch your lens or camera body to manual focus mode.
- Fine-Tune Focus – Slowly rotate the focus ring until the star or light appears small and razor-sharp. To ensure accuracy, slightly pass the sharpest point, then bring it back, repeating if necessary.
For those using longer focal lengths or telescopes, an astrophotography aid like a Bahtinov mask can be helpful. This specialized focusing tool sits over the front element of your lens or telescope, creating a starburst pattern. When perfectly focused, the starburst lines align precisely, allowing for precise focus adjustments with ease.

Zoom in on the rear screen and focus the lens manually.
Best Camera Settings for Capturing the Northern Lights
While ideal settings can vary based on light conditions and sky darkness, the following are strong starting points. Be prepared to adjust them to match the specific aurora activity and ambient light during your shoot.
- Stabilize and Compose – Mount your camera on a sturdy tripod and frame your shot using the viewfinder or Live View mode. Once satisfied, follow the manual focus steps mentioned earlier to ensure a sharp image.
- Set a Wide Aperture – Open your lens to the widest possible aperture, ideally f/2.8 or wider. This allows maximum light to reach the sensor, improving image clarity in dark conditions.
- Adjust ISO Sensitivity – Use an ISO setting between 1000 and 4000, depending on the brightness of the aurora and foreground. A higher ISO is needed for dim auroras, while brighter displays allow for a lower ISO to reduce noise.
- Control Shutter Speed – Set an exposure time between 1 to 15 seconds, based on how fast the aurora is moving. If the lights are active and shifting quickly, opt for a shorter exposure (1-5 seconds) to capture crisp details. If the aurora is more static, longer exposures (10-15 seconds) can enhance brightness without excessive motion blur.
- Minimize Camera Shake – Use an external shutter release for the sharpest results. If one isn’t available, enable exposure delay mode or use the self-timer function to avoid vibrations from pressing the shutter button.
By fine-tuning these settings based on real-time conditions, you’ll increase your chances of capturing stunning, well-defined images of the Northern Lights.
Although camera settings with vary from night to night, generally you’ll want a wide aperture, long shutter speed, and high ISO.
Tips for Strong Composition
Simply capturing the Northern Lights without context can result in flat, uninspiring images. To create visually engaging shots, apply these composition techniques:
- Incorporate Foreground Elements – Adding foreground interest provides depth and context to your images. Consider placing silhouetted trees, mountains, cabins, or frozen lakes in the frame. A dark boreal forest along the lower third of the frame can subtly define the landscape while allowing the aurora to take center stage.
- Experiment with Orientation – Both vertical and horizontal framing can work, depending on how the aurora moves. If the lights arc across the horizon, a horizontal (landscape) composition works best. If the aurora stretches directly overhead, a vertical (portrait) composition can emphasize its movement.
- Use the Rule of Thirds – Divide the frame into three equal sections and position key elements at the intersections. For example, place a tree or mountain in the foreground at one of these points, while ensuring the brightest or most detailed aurora section also aligns with a key intersection. This creates a well-balanced and visually compelling image.
By incorporating these composition techniques, your aurora photos will feel more dynamic and immersive, rather than just snapshots of the night sky.