Hyperfocal Distance: What It Is and How to Calculate It
Hyperfocal distance is one of the more technical aspects of photography, but understanding it can significantly enhance your images. At its core, hyperfocal distance refers to the point at which you focus your lens to maximize depth of field—ensuring everything from the foreground to the background appears sharp.
While the basic concept sounds simple, things become more complex when you dive into the specifics of calculating hyperfocal distance for different lenses and shooting conditions. To make sense of this often-confusing topic, let’s break down its mechanics and practical applications.
For this discussion, we’ll assume you’re already familiar with fundamental photography concepts such as aperture, focal length, depth of field, and the differences between prime and zoom lenses. If these terms are new to you, consider reviewing related topics before exploring hyperfocal distance in depth.
A Practical Example
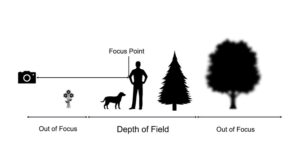
Imagine you’re capturing a landscape on a bright day. In the foreground, there’s a person; in the middle ground, a tree; and in the background, dramatic swirling clouds. The challenge? Choosing the right lens, aperture, and focus point to keep all three elements—foreground, midground, and background—sharp and well-defined.
By mastering hyperfocal distance, you can ensure your entire composition stays crisp, eliminating the guesswork and elevating the quality of your photography.

If you focus on the person, the tree might be out of focus. If you focus on the clouds, the person will likely appear blurry. Focusing on the tree could be a compromise, but there’s no guarantee that both the foreground and background will remain sharp. However, after some trial and error, you might find a “sweet spot”—let’s say 55 feet away—with your 85mm lens set to f/16. At this point, all the key elements in your shot appear crisp and clear. That “sweet spot” is your hyperfocal distance. Simply note down your settings—85mm, f/16, 55 feet—and now you have your hyperfocal distance for that specific scene.
Sounds simple, right? The challenge is that this distance is not universal. It applies only to that particular setup—same field, same person, same positioning. If the subject moves, you can’t rely on the same 55-foot measurement. So, is there a better way to determine hyperfocal distance without constant guesswork?
Yes, as long as we establish a clear definition. Hyperfocal distance is the closest focusing point, for a given lens and aperture, that ensures objects at “infinity”—such as distant clouds, stars, or mountains—remain sharp.
There’s actually a precise mathematical formula to calculate hyperfocal distance for any lens. However, it’s not very practical to use while shooting in the field. In real-world scenarios, you’ll often have to estimate and adjust on the go.
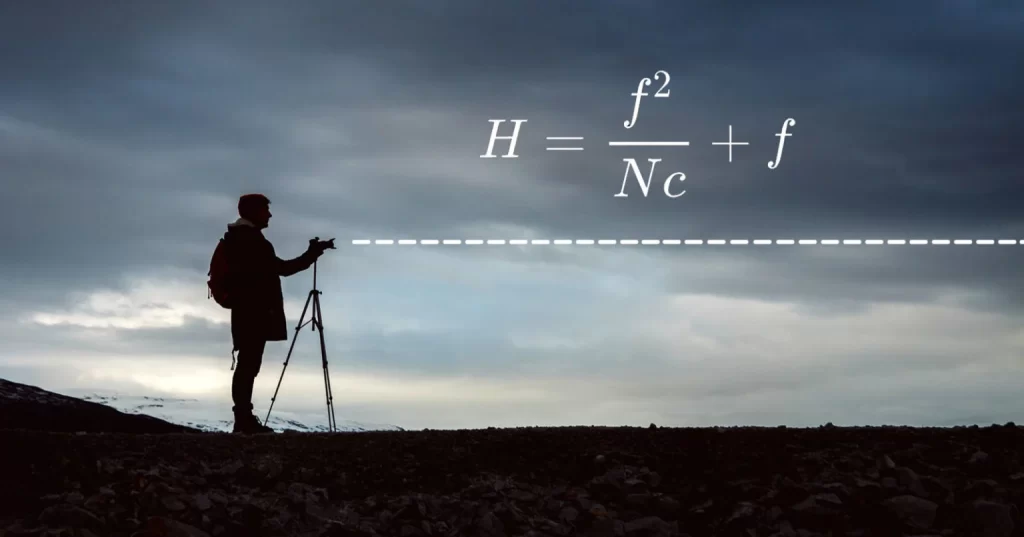
If you’re curious, the formula looks like this:
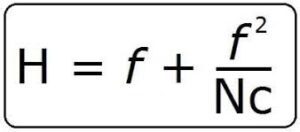
In this formula, f represents your focal length, N is your aperture, and c is the maximum circle of confusion—a measurement of how much blur is considered acceptable.
This brings us to a major challenge: defining what is “in focus” is highly subjective. In our example, the goal was to keep both the foreground subject and the distant clouds sharp. But what if one person prefers seeing every detail, while another is fine with a slight artistic blur? The lack of a universal standard for “sharp enough” makes calculating hyperfocal distance tricky.
You might expect a straightforward answer to this problem, but unfortunately, there isn’t one. Even though sharpness can be measured mathematically, individual preferences vary. What looks perfectly crisp to one person might not meet another’s standards.
The Subjective Approach
One method embraces this subjectivity. It suggests setting your aperture first, then adjusting your focus until distant objects appear sharp. With a zoom lens, you can refine your composition by zooming in or out, while with a prime lens, you may need to physically move to adjust your framing. The key is continuously tweaking your focus to ensure both foreground and background remain clear to your liking.
With this approach, hyperfocal distance will change depending on your aperture, since the point of focus is determined by what you consider acceptably sharp.
The Objective Approach
Others prefer a more structured method. This technique starts with a lower aperture, then finds the point where the background and foreground are equally sharp—or equally blurry. Since “equally sharp” and “equally blurry” are effectively the same thing, this provides a consistent way to determine focus. Once you’ve identified this focal point, you can then adjust the aperture to bring both areas into acceptable sharpness.
Unlike the subjective method, this approach keeps the hyperfocal distance constant regardless of aperture. Instead of relying on personal judgment, it’s based on a measurable balance between foreground and background clarity.
A practical version of this technique is called the “double distance” method. It works like this: measure the distance to the closest foreground object and double it. That’s your approximate hyperfocal distance. So, if the person in your scene is 30 feet away, your hyperfocal distance is roughly 60 feet. If you’re skilled at estimating distances—or have a laser rangefinder—this shortcut can save time by giving you a solid starting point before fine-tuning your aperture.
Pros and Cons
Each method has its own advantages. The subjective approach prioritizes keeping the background in perfect focus while doing the best possible job with the foreground. This makes it particularly useful for situations where background elements matter most—such as astrophotography or landscapes where the horizon is the focal point. It also tends to be more forgiving when using lenses with shorter focal lengths or limited aperture settings.
The objective approach, on the other hand, is ideal when both foreground and background elements are equally important. One major advantage is its consistency—once you know your foreground distance, the hyperfocal distance remains fixed for that lens and camera combination. Additionally, this method often results in cleaner compositions and requires less trial and error, making it a more efficient way to achieve balance in an image.
Shortcuts
So, are there any shortcuts to simplify this process? What about hyperfocal distance tables, smartphone apps, or even the focusing scale on a lens?
Tables and apps can be useful, but they come with limitations. Most of them are designed to prioritize background sharpness, which can result in a blurry foreground. Additionally, they are typically based on calculations optimized for 35mm film cameras and standard print sizes. If you’re using a full-frame digital camera and primarily producing 8×10 prints for display, these tools might work well. However, for other formats and output sizes, their results may not be as reliable.
The focusing scales on some lenses, however, can be an effective tool—if you know how to use them and if your lens has one. To determine hyperfocal distance using a lens scale, align the infinity symbol with your selected aperture. Then, check the distance marked at the center index line of your depth-of-field scale—that will be your hyperfocal distance. This method provides a quick, practical way to estimate focus without relying on external tools.

In this example, the aperture is set at f/11, so the focus ring is turned until the infinity symbols are lined up with the f/11 mark to the right of the center index line. The resulting hyperfocal distance (seen above the center line) is a little past 10 feet or 3 meters. To the left of the center line, the other f/11 mark indicates the distance at which acceptable sharpness begins, which, in this case, is a little past 5 feet and 1.5 meters.
The Reality of Focusing Scales
Nowadays, focusing scales are mostly found on high-end, manual-focus prime lenses. While some consumer-grade autofocus prime lenses include them, they tend to be imprecise. When it comes to zoom lenses, the only models with truly functional focusing scales were the push-pull zooms, which largely disappeared in the 1980s. Modern zoom lenses may have basic focus scales, but they are generally not reliable for precise hyperfocal distance calculations.
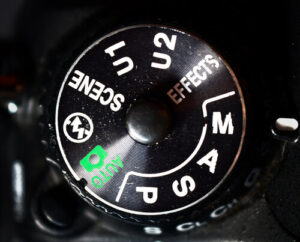
Interestingly, some older fixed-lens cameras feature a red dot on their focus dial. This dot marks the hyperfocal distance for that specific camera, providing a quick reference for achieving maximum depth of field.
Final Thoughts
To summarize, hyperfocal distance is the minimum distance at which you can focus while keeping objects at infinity sharp. You can determine it in two key ways:
- The Subjective Approach: Focus on infinity, then adjust your composition to bring the foreground into focus.
- The Objective Approach: Find the point where the foreground and background are equally out of focus, then raise the aperture until both become sharp.
While tables, apps, and lens scales can serve as shortcuts, they work best in specific conditions—mainly with full-frame cameras and traditional print sizes.
If you’ve made it this far, congratulations! Hyperfocal distance is one of the most technical aspects of photography, but mastering it gives you greater creative control over your images. The next time you’re out shooting with a manual lens, take a few minutes to practice. Once you get comfortable, estimating hyperfocal distance becomes second nature.