Illuminating Portraits: Mastering Rim Lighting Techniques

The introduction:
Portrait photographers can add depth, drama, and visual interest to their images by using rim lighting. Our comprehensive guide to rim lighting explores its applications, variations, and tools for creating stunning portraits. Your portraits can be taken to the next level when you master rim lighting, no matter which light source you use.
Rim lighting: An overview
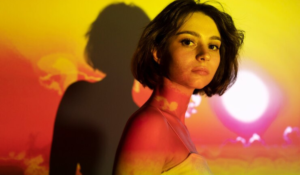
Rim lighting involves illuminating the edges of the subject, creating a distinct separation between them and the background. Using this technique, images gain depth and dimension, making them visually appealing.
Rim lighting has the following applications:
In portrait photography, rim lighting serves multiple purposes:
-
Rim lighting adds depth and dimension to images by clearly separating the subject from the background.
-
In portraits, the halo effect produced by rim lighting adds visual interest and draws attention to the subject.
-
In order to emphasize the silhouette of the subject, rim lighting can be used to make them stand out against the background.
-
In low-key or dramatic lighting setups, rim lighting adds a sense of mystery and drama.
Variations in rim lighting:
There are several ways to apply rim lighting:
-
When used alone, rim lighting can create a somber or isolated atmosphere.
-
A rim light can highlight the hair of a subject, adding depth and separating it from the background.
-
A rim light can serve as the main light source, illuminating the subject’s features and creating a dramatic effect.
-
An example of balanced lighting: Rim lighting can be balanced with other light sources to maintain detail in both shadows and highlights.
Rim lighting tools include:
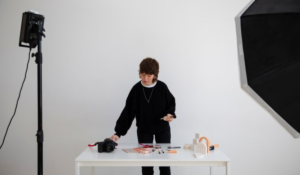
Rim lighting can be created using a variety of tools:
-
Often used to control the directionality and spill of studio strobes or continuous lights.
-
Softboxes and beauty dishes benefit from metal and fabric grids, which help control light spread.
-
Modifiers like snoots, flags, and Fresnels can be used to control light spillage and create a tight beam.
Lighting Rims Beyond the Studio:
The Golden Hour is a good time to take advantage of natural light for rim lighting outdoors. Outside, photographers can create stunning rim lighting effects by harnessing the light of the setting or rising sun.
In conclusion:
Creating stunning portraits is easy with rim lighting. Photographers can harness the power of rim lighting by understanding its applications, variations, and tools. A mastery of rim lighting can enhance the quality and impact of portrait photography, regardless of whether you use natural or artificial light.


