Using Flash in Wedding Photography: What You Need to Know
Using flash in wedding photography can feel overwhelming at first, but with the right approach, it becomes a powerful tool for enhancing your images. There will be moments when flash is necessary and others when it’s a creative choice, so understanding how to use it effectively is essential.
To master flash, it’s important to first understand how light and shadows affect photography. Once you grasp these fundamentals, you can use flash to control lighting, whether to improve poor conditions or achieve a specific artistic effect.
When to Use Flash in Wedding Photography
There are several situations where flash can make a difference in wedding photography.
One of the most obvious times to use flash is during nighttime events when there isn’t enough natural or ambient light. Wedding receptions, particularly those held indoors or outdoors after dark, often require extra illumination, especially when the venue dims artificial lights for moments like dancing.
Another common scenario is when harsh lighting creates unflattering shadows. Overhead lighting, for example, can cast unappealing shadows on faces, especially in group portraits. If natural shade isn’t available and you’re dealing with midday sun or poor indoor lighting, flash can help evenly illuminate your subjects.
Flash can also be used creatively to isolate a subject and minimize background distractions. If a scene is evenly lit, using flash as a spotlight can direct attention to your subject. Likewise, in a visually cluttered environment, flash can help darken distractions and emphasize key elements of the image.
In short, flash is useful for reducing shadows, highlighting subjects, minimizing distractions, and ensuring proper exposure in low-light conditions.
Essential Flash Techniques for Wedding Photographers
Wedding photographers should be familiar with different flash techniques to adapt to various lighting challenges.
On-Camera Flash (Bounce Flash)
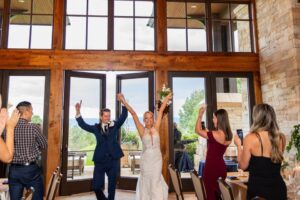
One of the most commonly used techniques is on-camera flash, where the flash is mounted directly on the camera. However, instead of using direct flash—which can create harsh, unflattering light—photographers often bounce the light off a ceiling, wall, or bounce card to achieve a softer, more natural look.
By understanding how to manipulate flash effectively, photographers can create beautifully lit wedding images while maintaining a natural, professional aesthetic.
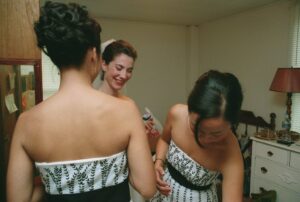
A photo illuminated by bouncing an on-camera flash.
Enhancing Flash Techniques in Wedding Photography
Another way to soften flash without bouncing is by using a modifier, such as a diffuser. These tools help spread light more evenly, reducing harsh shadows and creating a more flattering effect.
One ideal scenario for using bounce flash is when you’re moving through a dimly lit venue with low ceilings. This technique ensures well-exposed images without the need for off-camera flash, which some photographers prefer for more creative lighting. However, in fast-paced situations where setting up additional lighting isn’t practical, mastering bounce flash provides a reliable solution.
Off-Camera Flash
For more controlled and dynamic lighting, off-camera flash is an excellent choice. Unlike on-camera flash, off-camera units are mounted on stands and positioned at strategic angles—typically around 45 degrees—to produce natural, flattering light. A wireless trigger attached to the camera communicates with the flashes, allowing precise control over the lighting setup.
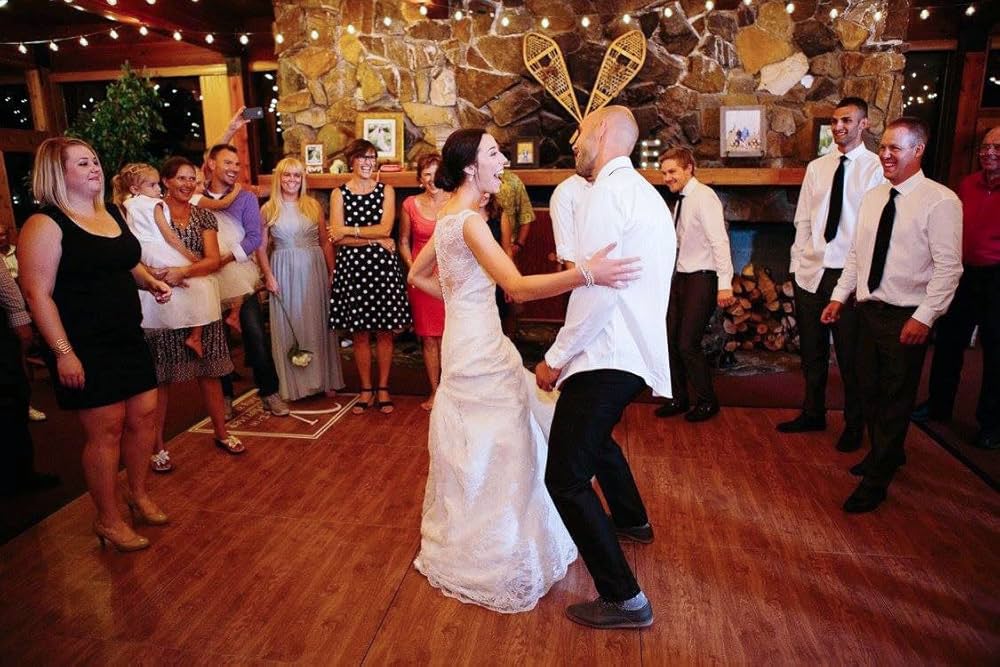
There are several ways to approach off-camera flash. A simple yet effective technique is stick lighting, where a flash is mounted on a lightweight stand and directed from the desired angle. This method is highly flexible, making it ideal for photographers who prefer a fast, adaptable workflow. However, it often requires an assistant to hold and maneuver the light for optimal positioning.
By mastering both bounce and off-camera flash techniques, wedding photographers can confidently handle various lighting challenges while achieving a professional and polished look in their images.
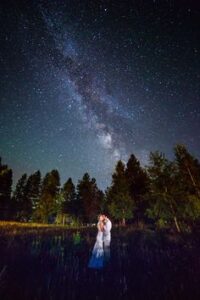
A wedding photo captured with a stick light.
Since I work alongside my husband, we can easily assist each other when setting up a stick light for dramatic shots. This allows us to quickly spotlight a subject when needed, whether for a creative portrait or an important moment. We also rely on this technique for seamless transitions between key events like speeches, cake cutting, and dances. While we may set up a four-light system for the dance floor, the cake table is often tucked into a corner, requiring a flexible lighting solution. The ability to move our lighting quickly ensures every part of the event is well-lit.
I also incorporate an off-camera flash setup for capturing getting-ready shots, particularly when I want to isolate my subject. The concept is similar to stick lighting, but in this case, I mount the flash on a stand instead of having someone hold it. This approach is especially useful in tight spaces where additional assistants aren’t an option, ensuring the lighting remains controlled and flattering without added clutter.
Advanced Off-Camera Flash Techniques
Another widely used off-camera flash technique involves a multi-light setup on the dance floor. Using two, three, or even four flashes positioned strategically allows for dynamic and well-balanced lighting while giving you the freedom to move around and capture energetic moments from different angles. This setup ensures subjects are illuminated in a visually interesting way, enhancing the overall feel of the images.
Creative Flash Techniques
Beyond traditional lighting setups, there are several creative flash techniques that can add depth and artistic flair to wedding photography.
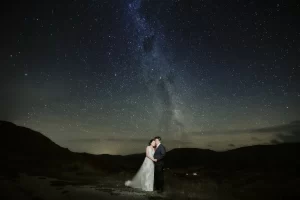
One technique is backlighting, where a flash is placed behind the subject to create a rim light effect. This helps separate the subject from the background, adding depth and drama to the shot.
Another approach involves lighting the background to enhance the scene. For instance, illuminating a textured wall can add visual interest, or you can create a silhouette effect by keeping the subject in shadow while highlighting the background.
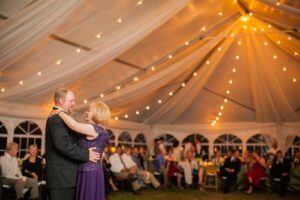
Dragging the shutter is another fun and creative technique. By using a slower shutter speed, you can capture ambient light—such as twinkle lights or cityscapes—while still using flash to properly expose your subject. This method is particularly effective for dance floor shots, adding movement and energy to the final image.
Mastering these advanced flash techniques allows wedding photographers to elevate their work, creating images that are not only well-lit but also artistically compelling.
Backlighting a couple with a flash placed behind them.
Wedding Photography Flash Gear
One of the biggest advantages of incorporating flash in wedding photography is the ability to create more dynamic, professional, and visually compelling images. Unlike guests snapping photos with their smartphones, well-executed flash photography ensures consistently high-quality results, even in challenging lighting conditions.
However, knowing when not to use flash is just as important. Sometimes, the best shot is the simplest one, and relying too heavily on flash can be distracting or unnecessary. A well-lit natural moment can often be more powerful than an overcomplicated setup.
The biggest drawback of using flash is that it significantly increases the amount of gear you need. While a camera, lenses, and batteries can fit neatly into a backpack, adding multiple lighting tools makes mobility more challenging.
To maintain efficiency, it’s best to keep gear minimal during most of the day and have a dedicated reception bag for evening events when lighting conditions are more difficult. Below is a streamlined flash gear list based on what we use—while we keep our setup fairly simple, it still requires thoughtful planning.
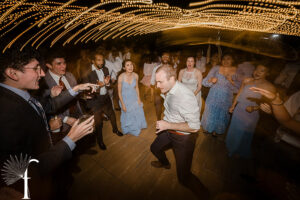
Dragging the shutter during dancing at a wedding.
Wedding Photography Flash Gear List
- Godox AD200 (x4): Ideal for receptions and portraits
- Godox V860II: Used for bounce flash and nighttime portraits
- Godox X-Pro-S Trigger: Controls AD200s and V860s
- MagMods with Grids: Helps control light direction and can be paired with CTO gels
- Lume Cube: Great for night shots, sparkler exits, and tricky low-light environments
- Godox AD-B2 Dual Flash Holder: Doubles the power of AD200s for shooting in bright daylight
- Light Stands: Two compact 8-foot travel stands and four 12-foot stands with sandbags for dance floors
- Clamps & Suction Cups: Useful for securing lights in getting-ready rooms
- Reflector: Owned but rarely used
Final Thoughts on Wedding Photography Flash
Understanding when and how to use flash is key to capturing stunning wedding images. Flash can elevate the quality of your work, allowing you to shoot in difficult lighting conditions, but it can also slow you down if overused.
A smart approach is to start simple, master one technique at a time, and experiment when the opportunity arises—hint: the ceremony is not the best time for trial and error.
As a husband-and-wife photography team, we take turns experimenting with creative lighting setups while ensuring the other captures key moments. If you don’t have a shooting partner, practice at home—we once set up reception lighting and tested it by taking dance shots of our dog!
By refining your flash techniques and balancing creativity with efficiency, you’ll be able to produce professional, beautifully lit wedding images that stand out.